Appearance
Useful tools for GreyScript
When working with GreyScript it can be a chore to always have to import your code into the game especially when it is split into different files or maybe you just want to quickly test an idea without being forced to start the game. This article will go over different chores and give a small overview of how to use different tools to save you time.
Manage your dependencies
greybel-js and greybel-vs both offer you several ways of importing code. Each option has its upsides and downsides but generally, it will enable you to minify your files, split your files and also avoid the in-game character limit in case your project gets too big.
Additionally, it offers an installer option when building that will bundle your code and generate installer files. These installer files will essentially contain all different code files and logic to create all files in the game. So basically you just need to copy and paste the code of the installer files into the game and then compile + execute them.
Let's go over a small example:
Imagine you have a file at ~/myProject/usefulFunctions.src that contains several functions:
gs
isAboveZero = function(num)
  return num > 0
end function

isBelowZero = function(num)
  return num < 0
end function

isTheAnswerToEverything = function(num)
  return num == 42
end function

ternary = function(condition, optionA, optionB)
  if (condition) then return optionA
  return optionB
end function
Now imagine you want to use usefulFunctions.src in your main file ~/myProject/main.src:
gs
import_code("usefulFunctions.src")

myNumber = 42

print("Is the number above zero? " + ternary(isAboveZero(myNumber), "Yes", "No"))
print("Is the number below zero? " + ternary(isBelowZero(myNumber), "Yes", "No"))
print("Is the number answer to everything? " + ternary(isTheAnswerToEverything(myNumber), "Yes", "No"))
By using greybel main.src --installer --uglify or the build command offered by greybel-vs in the context menu of VSCode you'll be able to build the project. After the build is done you should see a folder called /build/ in ~/myProject. It will contain 3 different files:
installer0.srcmain.srcusefulFunctions.src
Now you have the choice to either copy and paste the content of main.src and usefulFunctions.src into GreyHack or instead copy and paste only the content of the installer0.src file.
Let's go with the second option since less work is always better. Looking at the content of the installer0.src file you'll realize that it contains all the code from the two files:
gs
s=get_shell
c=s.host_computer
h="/root"
p=@push
print("Creating "+h+"/main.src")
c.touch(h,"main.src")
f=c.File(h+"/main.src")
l=[]
p(l,"globals.H=globals")
p(l,"H.R=""Yes""")
p(l,"H.S=""No""")
p(l,"import"+"_"+"code(""/root/usefulFunctions.src"")")
p(l,"I=42")
p(l,"print(""Is the number above zero? ""+J(K(I),R,S))")
p(l,"print(""Is the number below zero? ""+J(L(I),R,S))")
p(l,"print(""Is the number answer to everything? ""+J(M(I),R,S))")
f.set_content(l.join(char(10)))
print("Creating "+h+"/usefulFunctions.src")
c.touch(h,"usefulFunctions.src")
f=c.File(h+"/usefulFunctions.src")
l=[]
p(l,"K=function(N)")
p(l,"return N>0")
p(l,"end function")
p(l,"L=function(N)")
p(l,"return N<0")
p(l,"end function")
p(l,"M=function(N)")
p(l,"return N==42")
p(l,"end function")
p(l,"J=function(O,P,Q)")
p(l,"if (O) then")
p(l,"return P")
p(l,"end if")
p(l,"return Q")
p(l,"end function")
f.set_content(l.join(char(10)))
First, open a new CodeEditor window in GreyHack. After that, you just copy the content of the installer0.src file and paste it into the CodeEditor. Now press the compile button and save the binary to where ever you see fit. After the compilation was successful run the installer binary. You'll see that it'll create two files in the /root/ folder. (Unless you set the --ingame-directory parameter to something different) These two files should be main.src and usefulFunctions.src. As a last step, you only have to open the main.src file and compile your project.
I would not recommend using import_code for such a small project though. import_code was mainly used for the sake of giving an example. Instead, I would recommend either using #include or #import since those will put everything into one file.
There is a detailed explanation in the project description if you want to get more in-depth information.
Execute your code externally
Since GreyScript is based on MiniScript you got the possibility of using the online editor. This will only include basic intrinsics though. If you want to be able to use the intrinsics available within GreyScript you can use the GreyScript online editor, greybel-js or greybel-vs instead. All of these tools provide interpreters and intrinsics mocks which make it possible to call GreyScript intrinsics.
Besides that, there are several more features provided by these tools such as a debugger, partial TextMesh Pro Rich Text support or an on-the-fly generated local environment. More information is available here.
How to debug my code
First off you can just use the print function provided by GreyScript to track down bugs. But there are more sophisticated ways to track down issues. For example, by using either the GreyScript online editor, greybel-js or greybel-vs. These tools will enable you to debug your code more efficiantly.
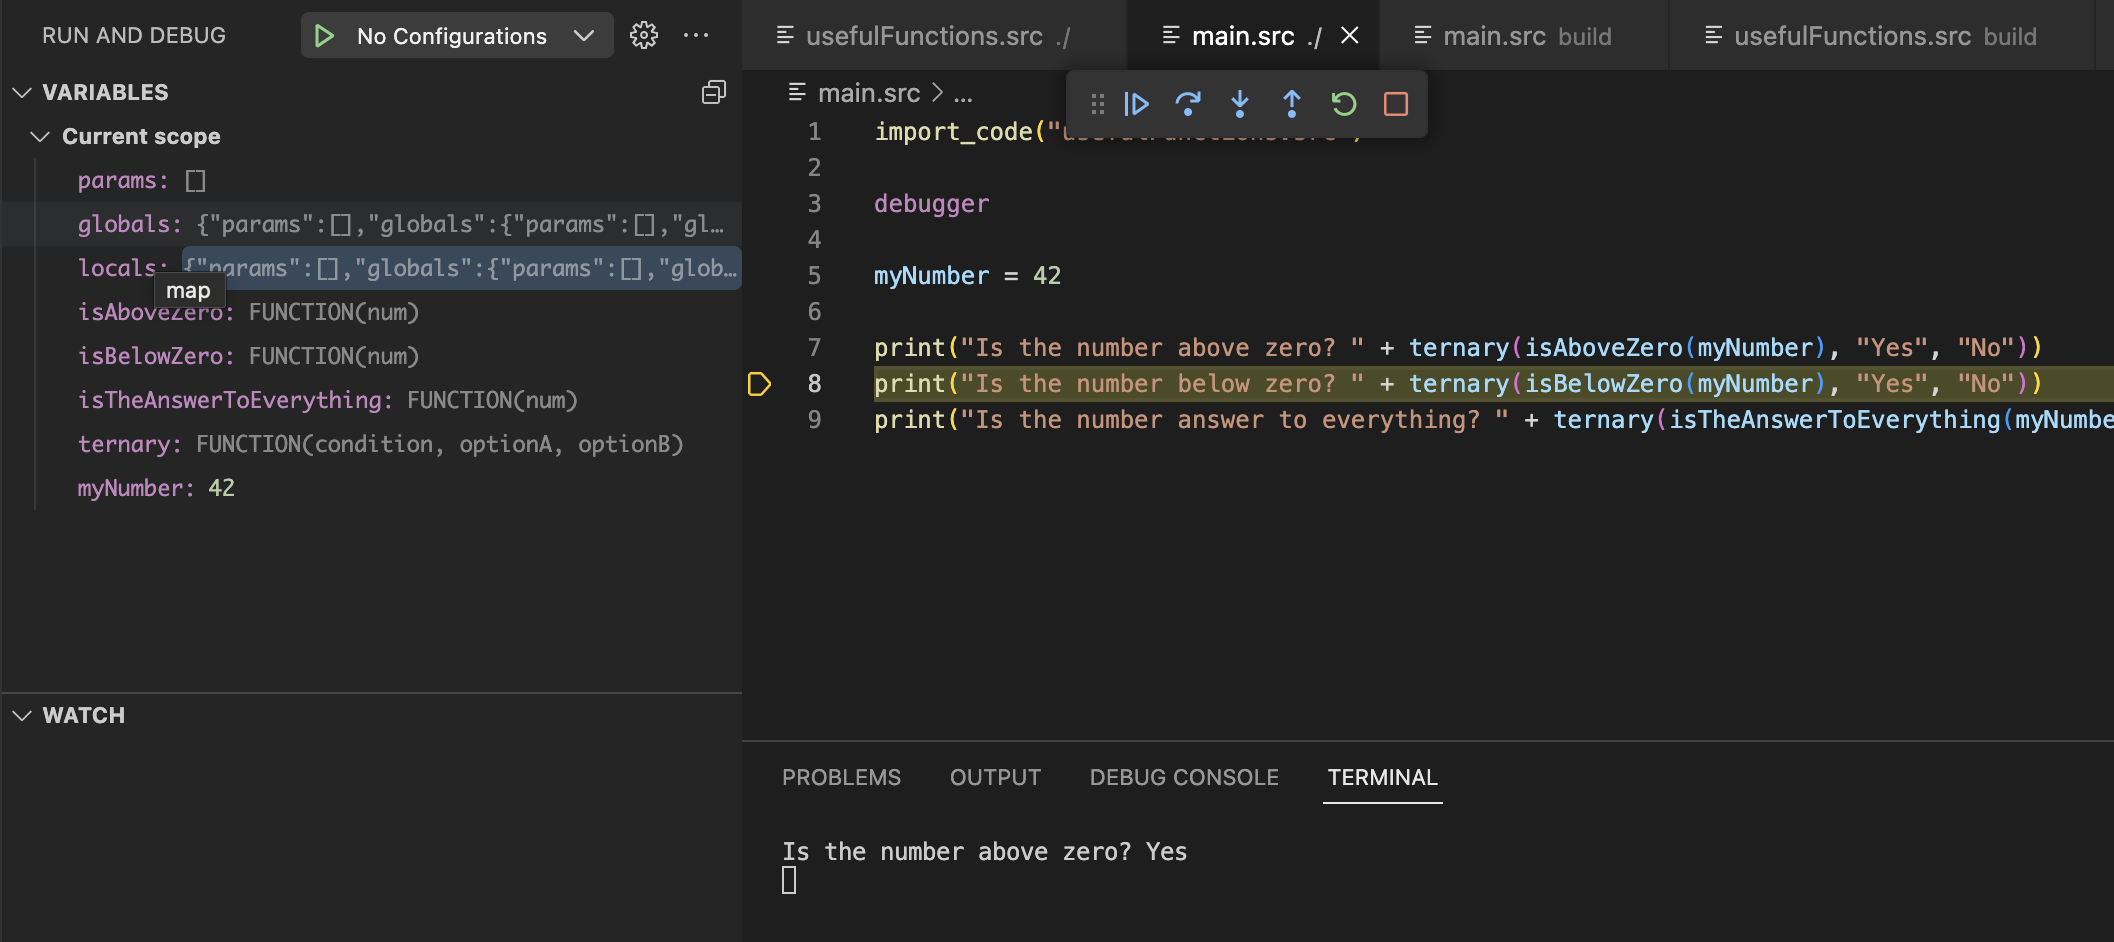
Both tools provide a debugger statement that will set a breakpoint when executing code.

Additionally, in VSCode you can set breakpoints on which greybel-vs will pause execution.
While a breakpoint is active you'll be not only able to inspect the call stack, current position and scope but also be able to inject and execute code.
Lastly, all of these tools will provide a test library for you to use. You only have to use the include_lib function. Here is an example:
gs
testLib = include("/lib/testlib.so")

failureFn = function
  get_shell(null, null)
end function

testLib.try_to_execute_with_debug(@failureFn)
By using try_to_execute_with_debug a breakpoint will be triggered when an execution fails. The testlib.so exposes several other useful methods. You can get more information on that here.